In this example we will look at the Atmel ATmega168 Xplained Mini board and will show you a simple code example – blink an LED.
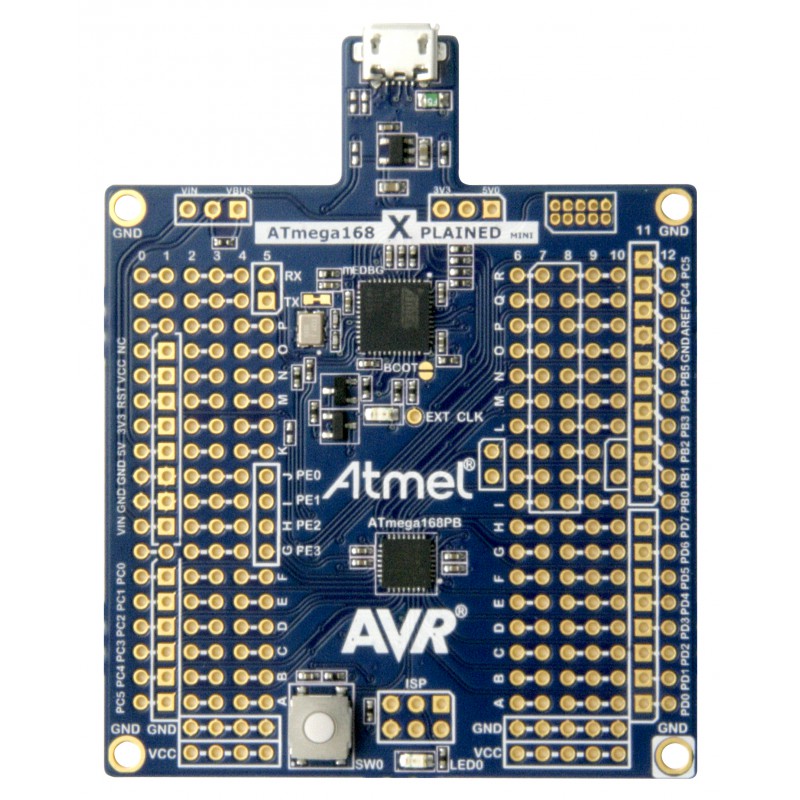
The Atmel ATmega168 Xplained Mini evalutation kit is a hardware platform for evaluating the Atmel ATmega168 microcontroller. The evaluation kit comes with a fully integrated debugger that provides seamless integration with Atmel Studio 6.2 or later. The kit provides access to the features of the ATmega168 enabling easy integration of the device in a custom design
Key Features
- On-board debugger with full source-level debugging support in Atmel Studio.
- Auto-ID for board identification in Atmel Studio 6.2
- Access to all signals on target MCU.
- One green status LED
- One mechanical user pushbutton
- Virtual COM port (CDC)
- 16MHz target clk
- USB powered
- Arduino shield compatible foot prints
- Target SPI bus header foot print
- Xplained Pro extension headers can easily be strapped in
- Supported with application examples published on Atmel Spaces
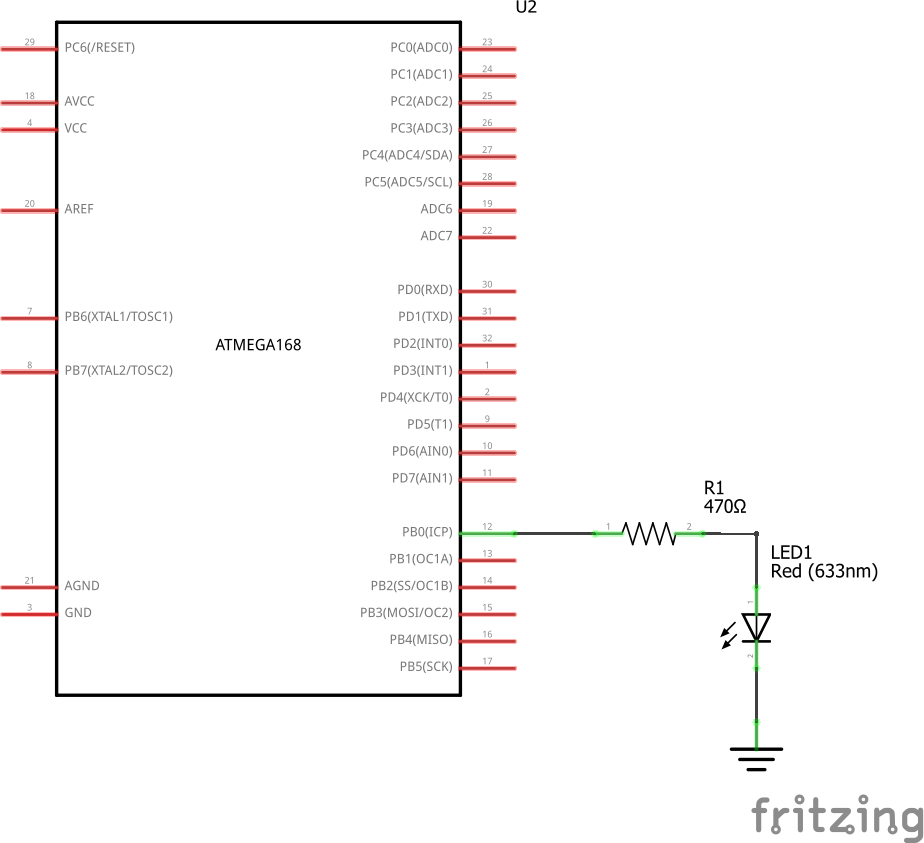
Schematic
This is a representation of the Atmega168 and the led atatche dto PB0
Code
The following code was written in Atmel Studio, it will flash an LED connected to B0. There is an onboard LED connected to B5 you could use as well
[codesyntax lang=”cpp”]
/*
 * Blinky.c
 * Flash the LED on the Atmega Explained board
 * Created: 27/12/2016 23:43:59
 * Author : AVRlearning
 */


#define F_CPU 16000000UL
#include <avr/io.h>
#include <util/delay.h>

int main(void)
{
 DDRB |= (1<<DDB0); //Set PB5 to output
 while(1)
 {
  PINB |= (1<<PINB0);
  _delay_ms(1000);        //Delay for 1 sec
 }
}
[/codesyntax]
Links