Another example for the OpenM128 AVR development board here, we will look at the onboard buttons and LEDs again.
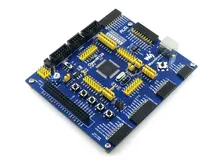
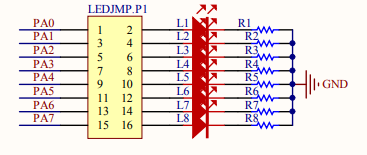
As stated in a previous article the development board has 8 LEDS and also 4 buttons available, in this example we will flash different sequences on the LEDs. Here are the pinouts of the LEDs and buttons from the schematic
These are the LEDs and as I stated you can see that these connect to PortA
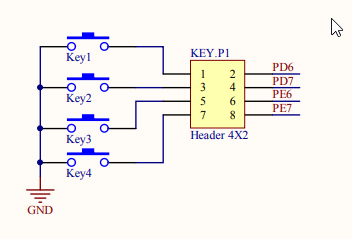
Now for the 4 buttons, in this case you can see the buttons are connected to PD6, PD7, PE6 and PE7
Parts List
The programmer is a bit more expensive but it works seamlessly with Atmel Studio
| Name | Link |
| OpenM128 Development Evaluation Board | ATmega128 AVR Development Evaluation Board Kit = OpenM128 Standard |
| AVRISP MKII | AT AVRISP mkII AVR ISP MK2 ISP2 downloader |
Atmel Studio code
In this example the 4 buttons will set different values to PortA as you can see below
[codesyntax lang=”cpp”]
#include <avr/io.h>
#include <util/delay.h>


void key_press(void)
{
	PIND &=0xC0;
	switch((PIND&0xC0))
	{
		case 0x80:  while((PIND&0xC0)==0x40);PORTA =0xAA;break;
		case 0x40:  while((PIND&0xC0)==0x80);PORTA =0x55;break;
	}

	PINE &=0xC0;
	switch((PINE&0xC0))
	{
		case 0x80:  while((PINE&0xC0)==0x40);PORTA =0x00;break;
		case 0x40:  while((PINE&0xC0)==0x80);PORTA =0xFF;break;
	}

}
int main(void)
{

	DDRD =0X00;
	DDRE =0X00;
	PORTD = 0xff;
	PORTE = 0xff;
	DDRA = 0xff;
	PORTA = 0x55;
	while(1)
	{
		key_press();
	}

}
[/codesyntax]
Programming
This time I used AtmelStudio and the USB AVRISP XPII and it worked perfectly